
Converting your BMW E46 from automatic to manual enhances performance, driver engagement, and control․ This guide provides a detailed walkthrough of the process, benefits, and requirements․
Why Convert Your E46 from Automatic to Manual?
Converting your E46 from automatic to manual enhances driving engagement, improves performance, and reduces maintenance costs․ A manual transmission offers better control, faster acceleration, and a more authentic driving experience․ It also eliminates the complexity and potential failures of automatic systems․ Additionally, a manual swap can increase the car’s value and appeal to enthusiasts, making it a rewarding modification for BMW E46 owners seeking a more connected driving experience․
Overview of the Process and Benefits
The E46 automatic to manual swap involves replacing the automatic transmission with a manual gearbox, including the clutch, pedals, and associated hydraulic systems․ This process requires careful planning, specialized tools, and mechanical expertise․ Benefits include improved performance, better fuel efficiency, and a more engaging driving experience․ The swap also reduces long-term maintenance costs and enhances the car’s appeal to driving enthusiasts, making it a worthwhile investment for BMW E46 owners seeking enhanced control and satisfaction behind the wheel․
Parts and Tools Required for the Swap
A manual transmission, clutch kit, flywheel, pedal assembly, and hydraulic systems are essential․ Specialized tools like a transmission jack and socket set are also necessary for the process․
Essential Components: Transmission, Clutch, and Pedals
The core of the swap includes a compatible manual transmission, typically a ZF S5D or similar, paired with a clutch kit and lightweight flywheel; The pedal assembly must be replaced with a manual-specific unit, including a clutch pedal and master/slave cylinders․ These components ensure proper gear engagement and smooth operation, requiring precise installation to maintain performance and reliability․ Additional hardware like bushings and linkages is also necessary for the conversion․
Additional Parts: Hydraulic Systems, Wiring, and Mounts
Beyond the transmission and clutch, hydraulics are crucial for smooth clutch operation․ A manual-specific wiring harness adapts the car’s electronics to recognize the new setup․ Transmission mounts and a crossmember ensure proper alignment and stability․ These components, often overlooked, are essential for a seamless swap and optimal performance, requiring careful selection and installation to avoid issues down the line․
Removing the Automatic Transmission
Removing the automatic transmission involves disconnecting electrical connectors, hydraulic lines, and draining fluids․ Use a hoist to safely lift and remove the heavy unit․ Ensure proper equipment is used for safety․
Step-by-Step Process for Transmission Removal
Begin by raising the vehicle and draining the transmission fluid․ Disconnect the electrical connectors, hydraulic lines, and mounts․ Remove the driveshaft and support the engine․ Use a transmission jack to carefully lift and slide the automatic transmission out․ Ensure all bolts and connectors are properly labeled for reinstallation․ Safety equipment and a second pair of hands are essential for this heavy and complex process․
Disconnecting Electrical and Hydraulic Connections
Start by disconnecting the electrical connectors linked to the transmission, such as the transmission control module and solenoid pack․ Next, carefully release the hydraulic lines from the automatic transmission, ensuring they are capped to prevent contamination․ Use a wrench to disconnect the hydraulic slave cylinder and fluid lines․ Be cautious to avoid spills or damage to the components during disconnection․ Properly label all lines and connectors for later reinstallation․
Installing the Manual Transmission
Mount the manual transmission by aligning the bellhousing with the engine․ Secure it using the provided bolts, ensuring proper alignment and torque specifications are met․
Aligning and Securing the Manual Transmission
Begin by aligning the manual transmission with the engine’s bellhousing, ensuring the input shaft aligns with the clutch․ Secure the transmission using the provided mounting bolts, tightening them evenly to avoid misalignment․ Use a torque wrench to apply the recommended torque specifications for the transmission mounts․ Proper alignment and securement are critical for smooth operation and to prevent damage to the drivetrain components․ Double-check the transmission’s position before final tightening to ensure accuracy and reliability․
Connecting Gear Linkage and Driveshaft
Remove the old gear linkage and install the manual transmission’s linkage, ensuring proper alignment and connection to the gear selector․ Attach the driveshaft to the manual transmission, verifying it is securely fastened with the correct bolts․ If necessary, shorten or replace the driveshaft to fit the new transmission․ Tighten all connections according to torque specifications to ensure proper function and avoid vibration․ Double-check all connections for accuracy before proceeding․
Clutch System Installation
Fitting the clutch kit, flywheel, and master/slave cylinders is essential for manual operation․ Ensure proper alignment and connection of hydraulic lines for smooth clutch engagement and disengagement․
Fitting the Clutch Kit and Flywheel
The clutch kit and flywheel installation is a critical step in the manual swap․ Begin by inspecting and resurfacing the flywheel if necessary․ Next, install the clutch disc, pressure plate, and release bearing, ensuring proper alignment using a clutch alignment tool․ This step requires precision to avoid clutch chatter or uneven wear․ Once the clutch kit is securely fitted, proceed to install the hydraulic components, including the master and slave cylinders, ensuring all connections are tight and free from leaks․ Always follow manufacturer guidelines for proper installation and torque specifications to guarantee reliability and performance․
Installing Clutch Master and Slave Cylinders
Install the clutch master cylinder on the pedal box and connect it to the slave cylinder near the transmission․ Ensure the hydraulic lines are securely attached and free from leaks․ Bleed the system thoroughly to remove air bubbles, which can cause inconsistent clutch engagement․ Finally, connect the clutch switch wire to the DME to enable proper engine control․ Proper installation ensures smooth and precise clutch operation․

Wiring and Coding for Manual Transmission
Adapt the wiring harness to support manual operation and code the ECU to recognize the manual transmission․ Use BMW GT1 or similar tools for proper configuration and activation․
Adapting the Wiring Harness for Manual Operation
Modify the E46’s wiring harness to accommodate manual transmission components․ Replace the automatic-specific wiring with manual transmission harness connectors․ Ensure compatibility with the clutch and gear linkage․ Install a clutch switch and reverse light circuit․ Reprogram the ECU to recognize manual operation, using tools like BMW GT1 or Autologic․ This ensures proper communication between the transmission and engine systems for seamless operation․
Coding the ECU to Recognize Manual Transmission
Coding the ECU is crucial for manual operation․ Use BMW GT1 or Autologic to update the ECU, ensuring it recognizes the manual transmission․ Perform a two-step process: write new FA codes to modules like EWS, AKMB/KMB, and LSZ․ This ensures proper communication between the transmission and engine․ Coding adapts the DME to manual mode, eliminating automatic-specific functions and optimizing engine control for manual operation․

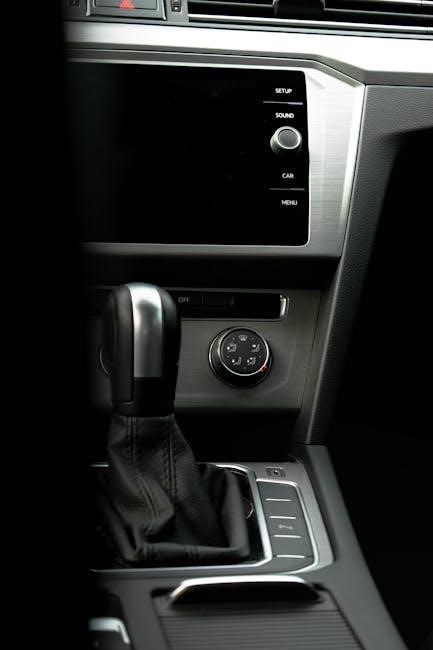
Pedal Assembly and Hydraulic Setup
Replacing the automatic pedal box with a manual setup is essential․ Install the clutch master and slave cylinders, then connect and bleed the hydraulic system thoroughly․
Swapping the Pedal Box for Manual Operation
Swapping the pedal box is a critical step in the manual conversion․ Remove the automatic pedal assembly and install the manual pedal box, which includes the clutch pedal․ Connect the hydraulic lines to the clutch master cylinder, ensuring proper alignment and secure fastening․ Bleed the hydraulic system to eliminate air bubbles for smooth clutch operation․ Refer to a workshop manual for precise instructions to avoid common mistakes during installation․
Installing Hydraulic Lines and Bleeding the System
Install the hydraulic lines from the clutch master cylinder to the slave cylinder, ensuring proper routing and connections․ Use high-quality, brake-rated hydraulic fluid to fill the system․ Bleed the hydraulic system thoroughly to remove air bubbles, starting from the slave cylinder and working upward․ This ensures smooth and precise clutch operation․ Double-check all connections for leaks and test the clutch pedal for proper feel and engagement before finalizing the setup․
Finalizing the Swap
Install manual transmission mounts and crossmember for stability․ Update the cooling system, ensuring proper radiator functionality․ Bleed hydraulic lines and reconnect electrical components․ Perform a test drive to verify smooth operation and address any issues, completing the conversion seamlessly․
Installing Manual Transmission Mounts and Crossmember
Mounts and crossmembers are crucial for stability․ Bolt the manual transmission mounts to the chassis, ensuring secure fitment․ Replace the automatic crossmember with a manual-specific one, aligning it properly․ Tighten all bolts to manufacturer specifications․ This step ensures the transmission is firmly supported, preventing movement and vibrations during driving, enhancing overall stability and performance․
Updating the Radiator and Cooling System
The radiator typically remains unchanged, but ensure it’s clean and functioning well․ Disconnect and seal the automatic transmission cooler lines, as they’re no longer needed․ Inspect the cooling system for leaks or damage․ If upgrading, consider a high-performance radiator for improved heat management․ Proper cooling ensures optimal performance and prevents overheating, especially with the manual transmission’s increased engagement and potential for spirited driving․
Budget and Time Considerations
A budget of $1,500 to $2,500 typically covers parts and labor․ The process requires 40-60 hours, depending on expertise, often spanning several weekends for completion․
Estimated Costs for Parts and Labor
Estimated costs for an E46 automatic to manual swap range between $1,200 and $2,500․ Parts like the ZF 5-speed transmission cost $350-$890, while labor can range from $300-$800․ Additional expenses include clutch kits, hydraulic systems, and wiring components․ Prices vary depending on the source and quality of parts․ DIY enthusiasts can save on labor costs but should budget for tools and potential unforeseen expenses․
Time Required for the Conversion Process
The E46 automatic to manual swap typically takes 2-5 days for a novice, depending on expertise․ Experienced mechanics can complete it in 1-3 days․ Key time-consuming steps include transmission removal, clutch installation, and wiring adjustments․ DIY enthusiasts should allocate additional time for tools setup and troubleshooting․ Professional shops often quote 1-2 days, ensuring a faster turnaround with specialized tools and familiarity with the process․
The E46 automatic to manual swap offers improved driving engagement, better control, and enhanced performance․ Drivers report a more satisfying experience behind the wheel, making the effort worthwhile․
Final Checks and Test Drive
After completing the swap, thoroughly inspect all connections, hydraulic lines, and mounts․ Ensure proper clutch operation and smooth shifting․ Test drive to verify smooth acceleration, clean gear engagement, and no unusual noises․ Check driveshaft alignment and fluid levels; Verify electrical system functionality, including clutch safety switch and reverse light operation․ Address any leaks or issues before enjoying the enhanced driving experience․
Converting your E46 from automatic to manual offers enhanced performance and control, with improved fuel efficiency and a more engaging driving experience․ However, the process is complex, requiring specialized tools and knowledge; Challenges include significant labor costs and potential technical difficulties․ Despite these hurdles, the rewards of a manual transmission make the effort worthwhile for enthusiasts seeking a more connected driving experience․