Hoover Spin Scrub Manual: A Comprehensive Guide

Welcome! This detailed manual provides essential guidance for maximizing your Hoover Spin Scrub’s performance. It’s designed for Canadian purchasers seeking advice‚
and covers setup‚ operation‚ maintenance‚ and troubleshooting for optimal cleaning results.
Explore recommended cleaning solutions‚ understand model variations‚ and locate replacement parts. This resource ensures a consistently clean and well-maintained floor.
Understanding the Hoover Spin Scrub
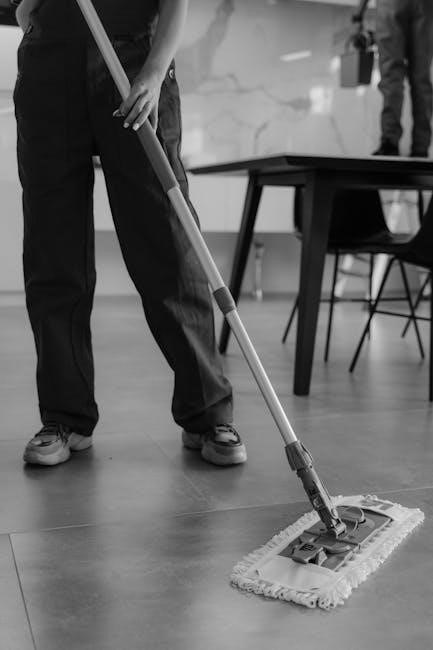
The Hoover Spin Scrub is a versatile‚ powered cleaning tool designed for effortless floor cleaning. Unlike traditional mops‚ it features rotating brush heads that agitate and lift dirt‚ grime‚ and stains from various hard floor surfaces. This innovative design minimizes scrubbing effort‚ making it ideal for those seeking a quicker and more effective cleaning solution.
Essentially‚ it combines the power of scrubbing with the convenience of a spray mop. The integrated spray function allows for controlled application of cleaning solutions‚ preventing over-saturation and ensuring efficient cleaning. Understanding its core function – powered scrubbing and controlled spraying – is key to maximizing its benefits.
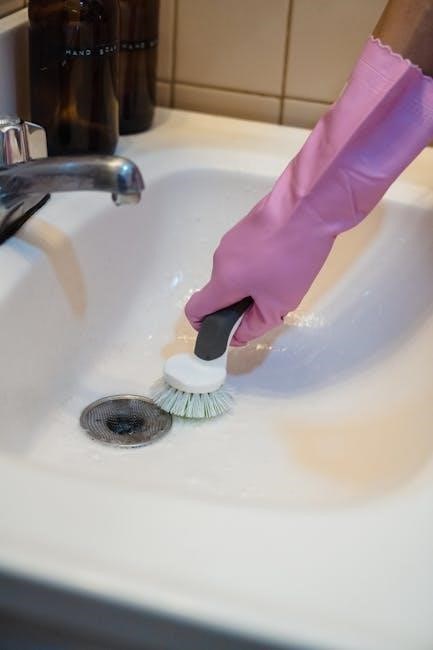
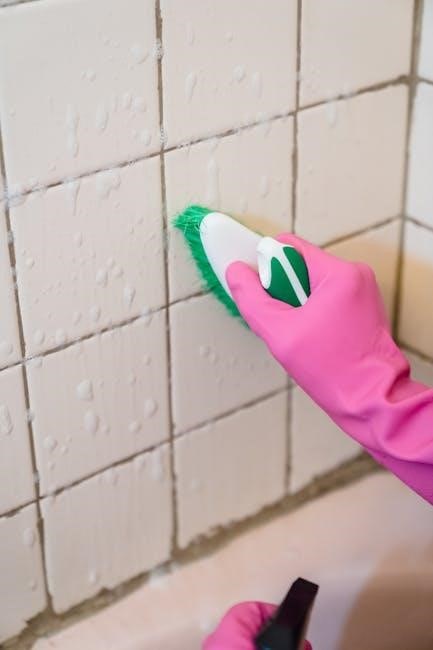
For Canadian users‚ considering flooring types and cleaning needs is crucial. The Spin Scrub is particularly effective on tile‚ vinyl‚ and sealed hardwood‚ but always check compatibility with your specific floor type. This tool aims to simplify floor care‚ offering a powerful alternative to manual scrubbing.
Key Features and Benefits
The Hoover Spin Scrub boasts several key features designed for superior cleaning performance. Its rotating brush heads deliver powerful scrubbing action‚ effectively lifting dirt and grime with minimal effort. The integrated spray function provides convenient‚ on-demand cleaning solution application‚ ensuring optimal moisture levels.
Benefits include reduced cleaning time and physical strain. Unlike traditional mopping‚ the Spin Scrub automates the scrubbing process‚ saving you valuable time and energy. Its lightweight design enhances maneuverability‚ allowing you to easily clean hard-to-reach areas.

For Canadian homeowners‚ this translates to a more efficient and effective cleaning routine. The Spin Scrub’s versatility makes it suitable for various floor types‚ offering a comprehensive cleaning solution. Considering budget and specific flooring needs‚ it presents a valuable investment in maintaining a clean and healthy home environment.
Model Variations: Identifying Your Spin Scrub
Hoover Spin Scrub models vary slightly in features and specifications. Identifying your specific model is crucial for accessing the correct support and replacement parts. Key differentiators include cordless versus corded options‚ and variations in brush head types included.
Early models often featured a standard corded design‚ while newer iterations offer the convenience of cordless operation with rechargeable batteries. Brush head packages can range from basic multi-surface options to specialized sets for tile‚ grout‚ or hardwood floors.
Locating your model number is typically found on a sticker located on the underside of the unit or near the battery compartment (for cordless models). Canadian retailers may carry specific variations tailored to the market. Knowing your model ensures compatibility with recommended cleaning solutions and accessories‚ maximizing cleaning efficiency.
Setting Up Your Hoover Spin Scrub
Initial setup of your Hoover Spin Scrub is straightforward. For corded models‚ ensure the power cord is securely connected to a grounded outlet. Cordless models require a full initial charge – typically 3-5 hours – before first use; Refer to the charging indicator light for status.
Next‚ attach the desired brush head. Most models feature a simple click-in mechanism. Ensure the brush head is firmly locked into place before operation. Fill the clean water tank with the appropriate cleaning solution (see ‘Cleaning Solutions’ section).
For optimal performance‚ pre-treat heavily soiled areas. Canadian users should verify voltage compatibility if purchasing from US retailers. Always inspect the unit for any damage before use. A properly set-up Spin Scrub will deliver powerful and efficient cleaning.
Operating Instructions: Step-by-Step Guide
Begin by selecting the appropriate brush head for your floor type. Ensure the unit is filled with the recommended cleaning solution. Power on the Spin Scrub – a clear indicator light will illuminate. Gently guide the unit across the floor‚ allowing the rotating brush heads to loosen dirt and grime.
Overlap each pass slightly to ensure complete coverage. Utilize the spray trigger for targeted cleaning of stubborn stains. Avoid excessive pressure; let the Spin Scrub do the work. For larger areas‚ work in manageable sections.
Canadian users should be mindful of potential cord placement. Regularly check the brush heads for debris buildup during operation. After cleaning‚ immediately rinse the unit and brush heads thoroughly with clean water.
Using the Spray Trigger
The spray trigger on your Hoover Spin Scrub delivers a precise stream of cleaning solution‚ ideal for tackling concentrated dirt or stubborn stains. Before use‚ confirm the solution reservoir is adequately filled. To activate‚ simply squeeze the trigger while the brush heads are in contact with the floor.
Employ short‚ controlled bursts to avoid oversaturation. This feature is particularly useful for high-traffic areas or spots requiring extra attention. Canadian users may find it beneficial for pre-treating heavily soiled areas before a full scrub.
Avoid prolonged spraying‚ as excessive moisture can damage certain floor types; Regularly inspect the spray nozzle for clogs and ensure it functions smoothly. Remember to release the trigger between sprays to conserve solution.
Adjusting Brush Head Speed
Your Hoover Spin Scrub features adjustable brush head speeds‚ allowing you to customize cleaning power for various floor surfaces. A lower speed is recommended for delicate floors like sealed hardwood or laminate‚ minimizing the risk of scratching or damage. This setting is also suitable for light cleaning tasks.
For tougher messes on tile‚ vinyl‚ or linoleum‚ increase the speed to a medium or high setting. This provides more aggressive scrubbing action to lift dirt and grime effectively. Canadian homeowners with varied flooring will appreciate this versatility.
The speed control is typically located on the handle for easy access during operation. Experiment with different speeds to find the optimal setting for your specific cleaning needs. Always test on an inconspicuous area first!
Cleaning Solutions: Recommended and Avoided
Selecting the right cleaning solution is crucial for maintaining your Hoover Spin Scrub and achieving optimal results. Generally‚ mild detergents specifically designed for hard floors are recommended. These solutions effectively lift dirt without damaging the brush heads or leaving behind a sticky residue.
For Canadian users‚ consider all-purpose cleaners diluted according to the manufacturer’s instructions. Avoid abrasive cleaners‚ scouring powders‚ or solvents‚ as these can scratch or discolor your floors; Never use bleach‚ ammonia‚ or oil-based products‚ as they can damage the Spin Scrub’s components.
Always rinse the floor thoroughly after cleaning to remove any remaining solution. Using the correct cleaning solution will prolong the life of your Spin Scrub and ensure sparkling clean floors.
Maintenance and Care
Regular maintenance is key to extending the lifespan of your Hoover Spin Scrub and ensuring peak performance. After each use‚ rinse the brush heads thoroughly with clean water to remove any lingering dirt or cleaning solution. Allow them to air dry completely before storing.
Periodically inspect the unit for any signs of damage‚ such as cracks or loose connections. Wipe down the exterior with a damp cloth to remove dust and grime. For Canadian users facing harsh winters‚ ensure the unit is completely dry before storing in cold temperatures to prevent freezing.
Proper care will prevent build-up and maintain optimal cleaning power. Consistent upkeep ensures your Spin Scrub remains a reliable cleaning companion for years to come.
Cleaning the Brush Heads
Maintaining clean brush heads is crucial for effective scrubbing and hygiene. After each use‚ detach the brush heads from the Hoover Spin Scrub. Rinse them under warm‚ running water‚ using your fingers to gently remove any trapped hair‚ debris‚ or dried cleaning solution.

For stubborn residue‚ a mild soap solution can be used. Ensure all soap is thoroughly rinsed away. Allow the brush heads to air dry completely before reattaching them to the unit. Canadian users should be mindful of hard water deposits and may need to soak the heads in a vinegar solution occasionally.
Regular cleaning prevents bacteria growth and ensures optimal scrubbing performance‚ extending the life of your brush heads and maintaining a sanitary cleaning process;
Replacing Brush Heads
Over time‚ brush heads will wear down and require replacement to maintain optimal cleaning performance. The frequency of replacement depends on usage and the surfaces cleaned. Regularly inspect your brush heads for frayed bristles‚ damage‚ or reduced scrubbing effectiveness.

To replace‚ ensure the Hoover Spin Scrub is powered off. Gently detach the worn brush head – typically a simple twist-and-pull mechanism. Align the new brush head with the corresponding attachment point and firmly twist until it clicks into place.
Canadian users can find genuine replacement brush heads at authorized Hoover retailers or online. Using non-genuine parts may void your warranty and compromise cleaning quality. Proper replacement ensures continued effective scrubbing and extends the lifespan of your Spin Scrub.
Troubleshooting Common Issues
Encountering problems with your Hoover Spin Scrub? This section addresses frequent concerns. If the unit fails to power on‚ first verify the power cord is securely connected to both the device and a functioning outlet. Check for tripped circuit breakers or blown fuses.
A malfunctioning spray trigger often indicates a clogged nozzle. Detach the cleaning solution tank and rinse the nozzle thoroughly with warm water. Ensure the tank is properly seated and the spray trigger is unobstructed.
For Canadian users‚ remember to consult the warranty information before attempting complex repairs. If issues persist‚ contact Hoover customer support for assistance. Avoid disassembling the unit beyond basic maintenance procedures.
Unit Not Powering On
Is your Hoover Spin Scrub refusing to start? Begin with the simplest checks. Ensure the power cord is firmly plugged into both the Spin Scrub and a working electrical outlet. A loose connection is a common culprit. Next‚ investigate your home’s electrical system.
Check the circuit breaker panel to confirm the circuit supplying power to the outlet hasn’t tripped. If it has‚ reset it. Also‚ examine any nearby fuses – a blown fuse will prevent power flow. For Canadian users‚ ensure the outlet meets Canadian electrical standards.
If the problem persists‚ try a different outlet to rule out an outlet issue. Avoid using extension cords if possible‚ as they can sometimes limit power delivery. If none of these steps resolve the issue‚ contact Hoover customer support.
Spray Trigger Malfunction
Experiencing issues with the spray trigger on your Hoover Spin Scrub? First‚ verify the cleaning solution tank is adequately filled. A low fluid level can prevent proper spraying. Next‚ inspect the spray nozzle for any blockages. Mineral deposits or dried cleaning solution can obstruct the flow.
Carefully remove the nozzle (refer to the ‘Maintenance and Care’ section for instructions) and rinse it thoroughly with warm water. For stubborn blockages‚ soak the nozzle in a solution of vinegar and water. Ensure the solution line isn’t kinked or pinched‚ restricting fluid movement.
If the trigger still doesn’t function‚ try gently pumping it several times to prime the system. If problems continue‚ contact Hoover support for assistance‚ potentially indicating a faulty trigger mechanism.
Safety Precautions
Prioritize safety when operating your Hoover Spin Scrub! Always disconnect the unit from the power outlet before performing any maintenance or troubleshooting. Never immerse the main unit in water or any other liquid; this poses a serious electrical hazard.
Avoid using the Spin Scrub on delicate surfaces that could be scratched or damaged by the brush heads. Keep children and pets away from the operating unit. Do not operate the device with a damaged cord or plug.
Only use cleaning solutions recommended in the ‘Cleaning Solutions’ section. Avoid flammable or corrosive substances. Wear appropriate eye protection to prevent splashes. If the unit malfunctions‚ cease use immediately and consult the troubleshooting guide or contact Hoover customer support.
Storage Instructions
Proper storage extends the life of your Hoover Spin Scrub! Before storing‚ ensure the unit is completely dry. Empty the clean and dirty water tanks to prevent mold and mildew growth. Detach the brush heads and clean them thoroughly‚ allowing them to air dry completely before reattaching.
Store the Spin Scrub in a cool‚ dry place‚ away from direct sunlight and extreme temperatures. Avoid storing it in areas prone to freezing. Keep the power cord neatly coiled and secured to prevent damage.
If possible‚ store the unit in its original packaging to protect it from dust and accidental impacts. Regularly inspect the stored unit for any signs of damage or deterioration. Following these guidelines ensures your Spin Scrub remains in optimal condition for future use.
Warranty Information
Your Hoover Spin Scrub is protected by a limited warranty! The standard warranty covers defects in materials and workmanship for a period of one year from the date of original purchase. This warranty applies to normal household use and does not cover damage resulting from misuse‚ abuse‚ or unauthorized repairs.
To make a warranty claim‚ retain your original purchase receipt as proof of purchase. Contact Hoover customer support with details of the issue. They may request you to ship the unit to an authorized service center for inspection and repair.
The warranty does not cover consumable parts‚ such as brush heads. Modifications or alterations to the product void the warranty. Please refer to the separate warranty document included with your Spin Scrub for complete details and limitations.
Where to Find Replacement Parts
Maintaining your Hoover Spin Scrub is easy with readily available replacement parts! For Canadian customers‚ several options exist to procure new brush heads‚ spray nozzles‚ and other components.
Firstly‚ visit the official Hoover Canada website. Their online store typically stocks a comprehensive range of parts compatible with your Spin Scrub model. Alternatively‚ major retailers like Canadian Tire‚ Walmart Canada‚ and Best Buy often carry Hoover accessories both in-store and online.
For specialized parts or if you’re unsure of compatibility‚ contacting Hoover customer support directly is recommended. They can guide you to authorized retailers or provide direct ordering options. Remember to have your model number handy when searching or contacting support!